Nordictrack treadmills are, without a doubt, one of the finest fitness machines available. They are solidly built, have a lot of features, and are very durable. However, like all other pieces of equipment, they need to be moved at some point. This can be done easily by disassembling the treadmill into smaller pieces. If you have wondered how to disassemble NordicTrack Treadmill for moving, storing, or cleaning, this post is for you.
It may also be necessary to take apart the machine at times for cleaning purposes because there are a lot of tight passages within. Another reason might be that you want to keep your NordicTrack Treadmill in storage for longer.
Take a look at our Top 3 NordicTrack treadmills on Amazon Now:
Table could not be displayed.However, learning how to disassemble the NordicTrack treadmill for moving will assist you in preserving the delicate components without damaging them. So keep reading, and I’ll show you how to get inside your favorite Nordictrack tread, carefully remove it, and keep it functioning after reassembling it.
Check our other guide on How to Disassemble a Proform Treadmill if you are not a NordicTrack user.
How hard is Disassembling a NordicTrack Treadmill?
The whole process is pretty straightforward, but there are a lot of little details that must be understood before beginning the process. However, disassembling your NordicTrack treadmill will be easy once you have read this guide carefully and understand what to do.
There are several delicate components within, which you must handle with care, especially if it’s a Nordictrack shock-absorbing treadmill. Furthermore, while disassembling it, you must keep track of the steps you’re taking. It is critical to follow, especially if you are relatively new to the game, to put it back together.
Step by step guide on How to Disassemble Nordictrack Treadmill for Moving
It’s a complicated process to disassemble a Nordictrack treadmill for relocation, but with the proper approach, it’s simple. Here is the step-by-step procedure for disassembling a NordicTrack treadmill for cleaning, moving, storing, or any other reason:
Step 1: Disconnect the treadmill from the power source
The first step is to disconnect the fitness equipment from the power source. This is done by removing the power cord from the machine and the power source. It also protects the treadmill’s inner mechanism while you remove it from the machine. If you overlook this step and begin dismantling the equipment, electricity may cause damage to the inside and perhaps even electrocute you. So, instead of removing the power cord from the treadmill to a wall outlet, unplug it from both devices to avoid electrocution.
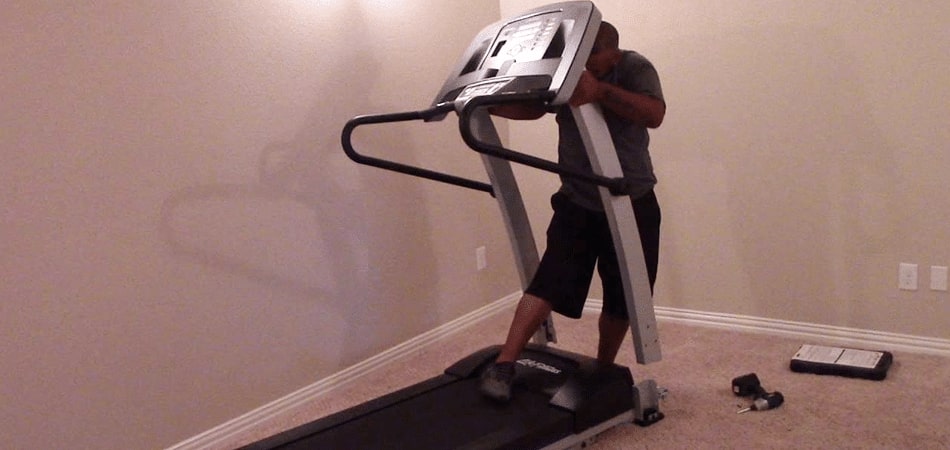
Step 2: Detach the console unit
The console is attached to the front of the machine with four screws. Remove these screws with a Phillips head screwdriver and set the console aside. You can now see the motor, which is located in the center of the treadmill. The most sensitive component of the NordicTrack treadmill is its control panel or console. It’s where you change everything from speed to incline settings. Depending on which model you have, there are various approaches for detaching this part.
Here’s a straightforward guide to taking the console apart, which works for any NordicTrack treadmill.
Disconnect the grounding wire
The NordicTrack treadmill has a grounding very thin wire from the console to the back of the treadmill. The beginning and end of the grounding wire are visible in the rear of the console, where a hole is drilled. Remove the cable from the rear of your treadmill’s console and continue with the clamps.
Detach console clamps
Once you’ve freed everything from the electricity, it’s time to detach the console clamps. Unfortunately, the clamps on top of the treadmill unit must be successfully removed first. To remove the clamps, use the 9-inch rod (included in the treadmill package). It’s a safe technique to get it done; all four/six screws should come right off with ease if you remove them one at a time.
Get the console removed
With the clamps out of the way, you can now pry the console off with your hands. There are four clips on the front of the console that holds it in place. Pry it open by inserting a thin object, such as a putty knife or Phillips screwdriver, into the crack between the console and treadmill. You should see two notches on either side of each clip. If you have a hard time prying it open, insert something metal (like a key or butter knife) into one of the screws on the back of the console. This will give you some leverage to pop off the clips.
Once all four clips are released, pull up on the console to remove it from the treadmill. Be careful not to pull too hard to save the console wire. The two ribbon cables that connect the console to the motor are incredibly fragile and can easily snap if pulled too hard.
Step 3: Remove the walking belt
To remove your walking belt, slide a piece of wood beneath it or use a 1-inch thick wooden dowel rod. Slide it under one side of the walking belt approximately ½-inch from either end and lift it off. Next, slide a replacement walking belt in place, making sure it’s flush with the front of the treadmill deck and aligned across all rollers on both ends.
Step 4: Fold the treadmill
Now that the console, motor, and walking belt are removed, the treadmill is ready to be folded for moving the treadmill. First, locate the two metal brackets on the back of the treadmill. These brackets are located at the top of the machine (near the console) and the bottom (near the motor).
Step 5: Move the treadmill to its new location
Lift the treadmill by gripping each side of the console. Use care when moving it around to avoid injury. It may help to ask another person for assistance if needed (especially when transporting the machine up and downstairs). You can also detach the bottom bracket with an Allen wrench or Philips screwdriver to make it easier to move around. If you’re relocating your treadmill across carpeting, you’ll need to remove the non-slip rubber feet before pushing it across, so it doesn’t get stuck.

Step 6: Unfold and Reassemble the treadmill after moving
Follow these steps in reverse order once you’ve moved your Nordictrack treadmill into place.
First, place all parts back on slowly, making sure nothing gets damaged in transit.
Next, reconnect the ground wire to the back of the treadmill and attach the console clamps.
Next, reattach the walking belt by placing a piece of wood or dowel rod beneath it and lifting it into place. Make sure it’s aligned with all rollers on both ends before tightening the screws.
Finally, reattach the two metal brackets at the top and bottom of the treadmill. You’re now ready to start your workout!
Final Words on How to Disassemble Nordictrack Treadmill for Moving
Now that you know how to disassemble your Nordictrack treadmill for moving, you can easily relocate it to its new home. Be sure to follow these steps in reverse order once you’ve arrived, and your treadmill will be up and running in no time!